
» About » Archive » Submit » Authors » Search » Random » Specials » Statistics » Forum » RSS Feed Updates Daily
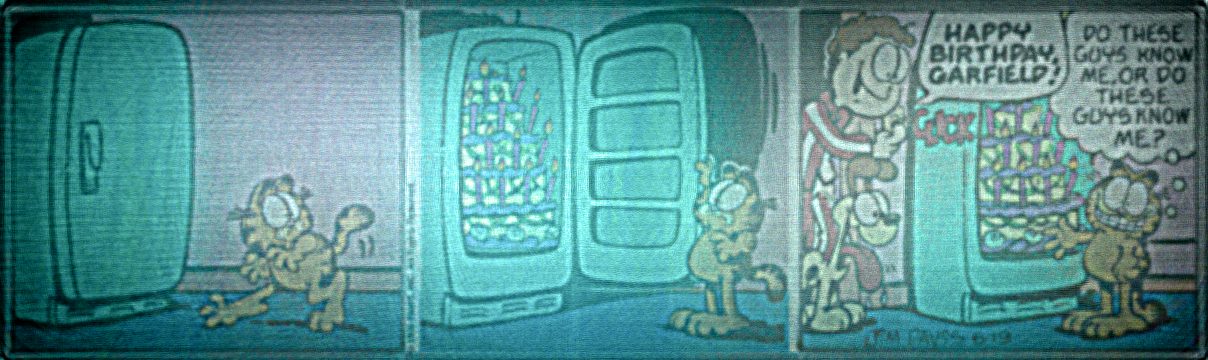
No. 2056: What's inside the Fridge?
First | Previous | 2015-01-04 | Next | Latest
First | Previous | 2015-01-04 | Next | Latest
Permanent URL: https://mezzacotta.net/garfield/?comic=2056
Strip by: Toni Ylisirniö, Alien@System
{Fuzzy image of Garfield strip as run through a CT scan.}
Jon: Happy birthday, Garfield!
Garfield: Do these guys know me, or do these guys know me?
The author writes:
CT scanners are really useful for looking inside things, like this fridge.
Building on Alien@System's CT scanner from #1770, here's what the result of scanning an entire strip looks like after it's been reconstructed again.
Instead of solving simultaneous linear equations, my program used another method to reconstruct the image from the CT data: filtered back projection. Benefit of FBP is that it's simpler and not as computationally expensive, but the tradeoff is that it doesn't have as good image quality as methods using linear algebra or iterative solving.
Conceptually back projection is very simple. Since we're working with 2D art, each projection slice is just 1D line. (Whereas in a 3D CT each projection slice would be a 2D image, exactly like a regular X-ray image.) The source data for this strip was similar to the data in #1770, each pixel column is one slice.
We start with the first slice, and then we perform the back projection. We take the slice and extend it, or "smear", across the image plane along the axis we used to take the X-ray. The end result looks something like an image with streaks running across it as the 1 pixel column got stretched.
Then we take the next slice and perform the same smearing along the angle it was taken. And the next one, and the next one, and the next one, until we've gone through all slices. At the end we average all these projections together which gives us the reconstructed view of the inside of the object we're scanning.
Now, if we did all that, we'll find that our final image is all there, but all the details are very blurry. That's because they got smeared across all the different slices. This is where the filtered part comes in. Before we do the back projection, we apply a filter to each individual slice first. This is very much just like the sharpening filter in any image processing application, only computed in much more fancier way.
If you do run a sharpen filter on a photograph, you may notice that the acutance is increased because the filter overshoots at edges. This is why grossly oversharpened images seem to have halos around things. In ordinary photograph processing this is usually undesirable, but in our case this is exactly what we want. These overshoots where the filter compensates for the changes in brightness are what will erase the halos caused by the smearing of multiple slices together.
And thus what we're left with now is an image that is quite good representation of the insides of something, taken just by external observation with X-rays.
[[Original strip: 1990-06-19.]]
Original strip: 1990-06-19.
Irregular Webcomic! | Darths & Droids | Eavesdropper | Planet of Hats | The Prisoner of Monty Hall
mezzacotta | Lightning Made of Owls | Square Root of Minus Garfield | The Dinosaur Whiteboard | iToons | Comments on a Postcard | Awkward Fumbles
Garfield and associated character names and likenesses are registered trademarks of Paws, Inc., which does not sponsor, authorise, or endorse this site.
This is a fan-produced parody site. Original comic strips are copyright Paws, Inc. and are used here only as a vehicle for parody.
Original aspects of this work are licensed under a Creative Commons Attribution-Noncommercial-Share Alike 3.0 Unported Licence by The Comic Irregulars. sromgsubmissions@gmail.com